Loginizer banner

Subscribe to Newsletter

Subscribe to get latest article or newsletter of our products

By entering your email, you agree to our Terms of Service and Privacy Policy.

Note: If a Loginizer account does not exist it will be created.

Buy Now
How to configure Passkey in Loginizer

Passkeys let users log in with their fingerprint, face recognition, or device PIN instead of a password. They are resistant to phishing and can't be leaked in a data breach, because your site never stores a shared secret.

Requirments

  • Your site must be served over HTTPS (passkeys won't work over plain HTTP)
  • A browser and device that support passkeys (recent Chrome, Safari, Edge or Firefox; Windows Hello, Touch ID/Face ID, Android, or a hardware security key).

How to Setup Passkey?

Step 1: Enable passkeys
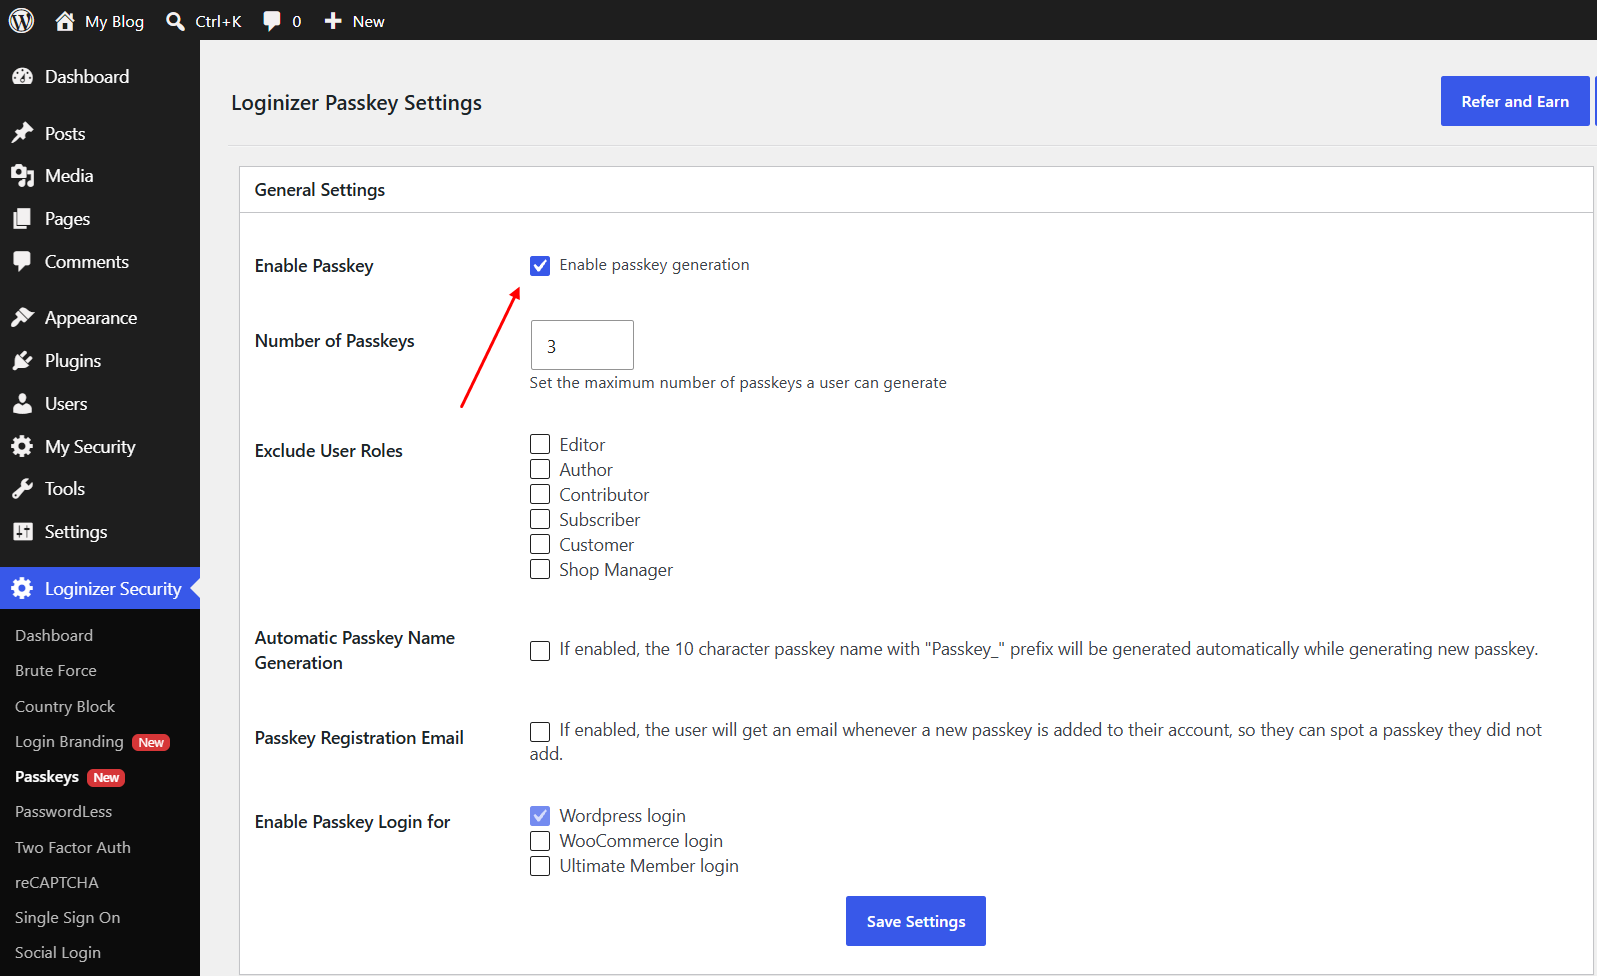
  • In your WordPress admin, go to Loginizer Security → Passkeys
  • Check Enable and click Save Settings
  • Reload the page. A new My Security menu now appears in the left sidebar.
Enabling passkey in Loginizner

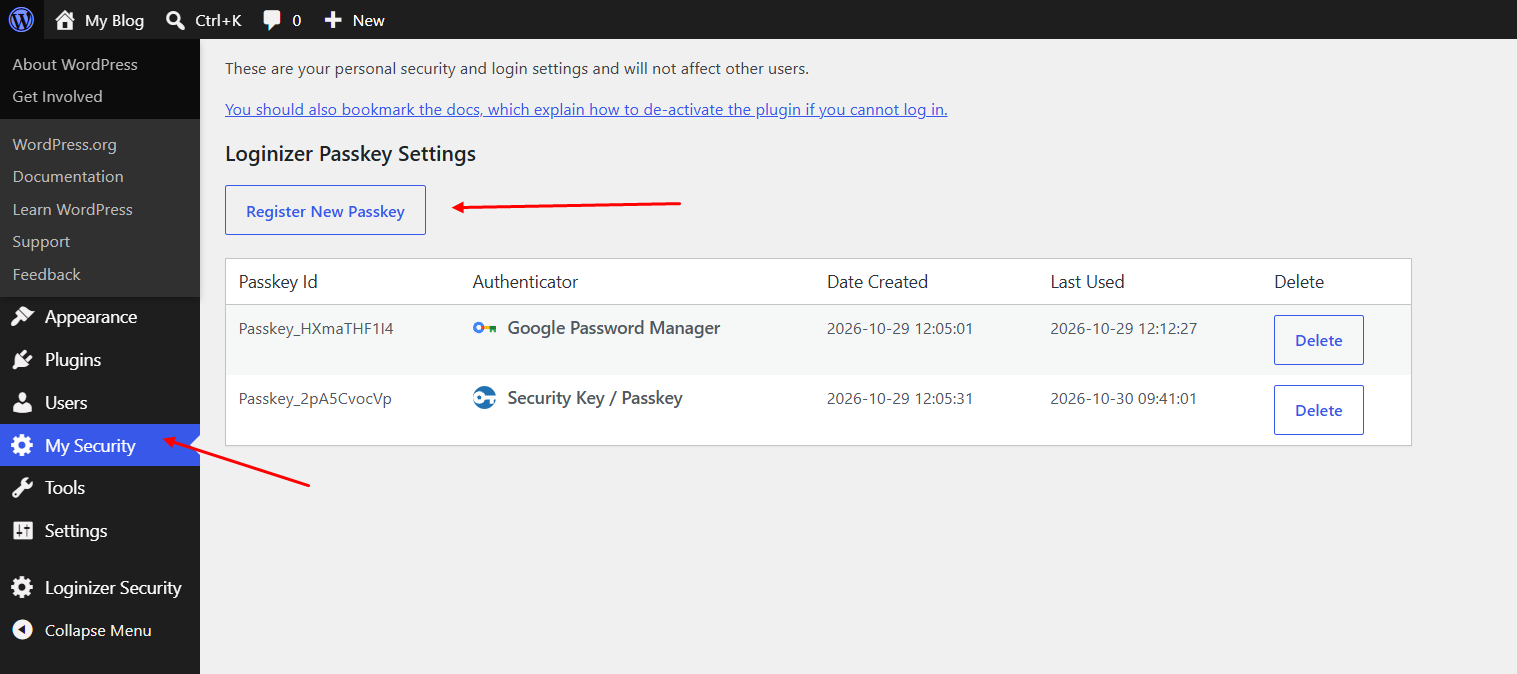
Step 2: Register a passkey

  • Go to My Security page
  • Click Register New Passkey button
  • Your browser will ask you to confirm with your fingerprint, face, PIN or security key.
  • Give the passkey a name, such as "Work laptop". It now appears in your list of passkeys.
Registering Passkey
Each user registers their own passkey from My Security. Add one for every device you log in from.

Step 3: Log in with a passkey On the login page

On the login page, Click Login with Passkey, then confirm with your device.
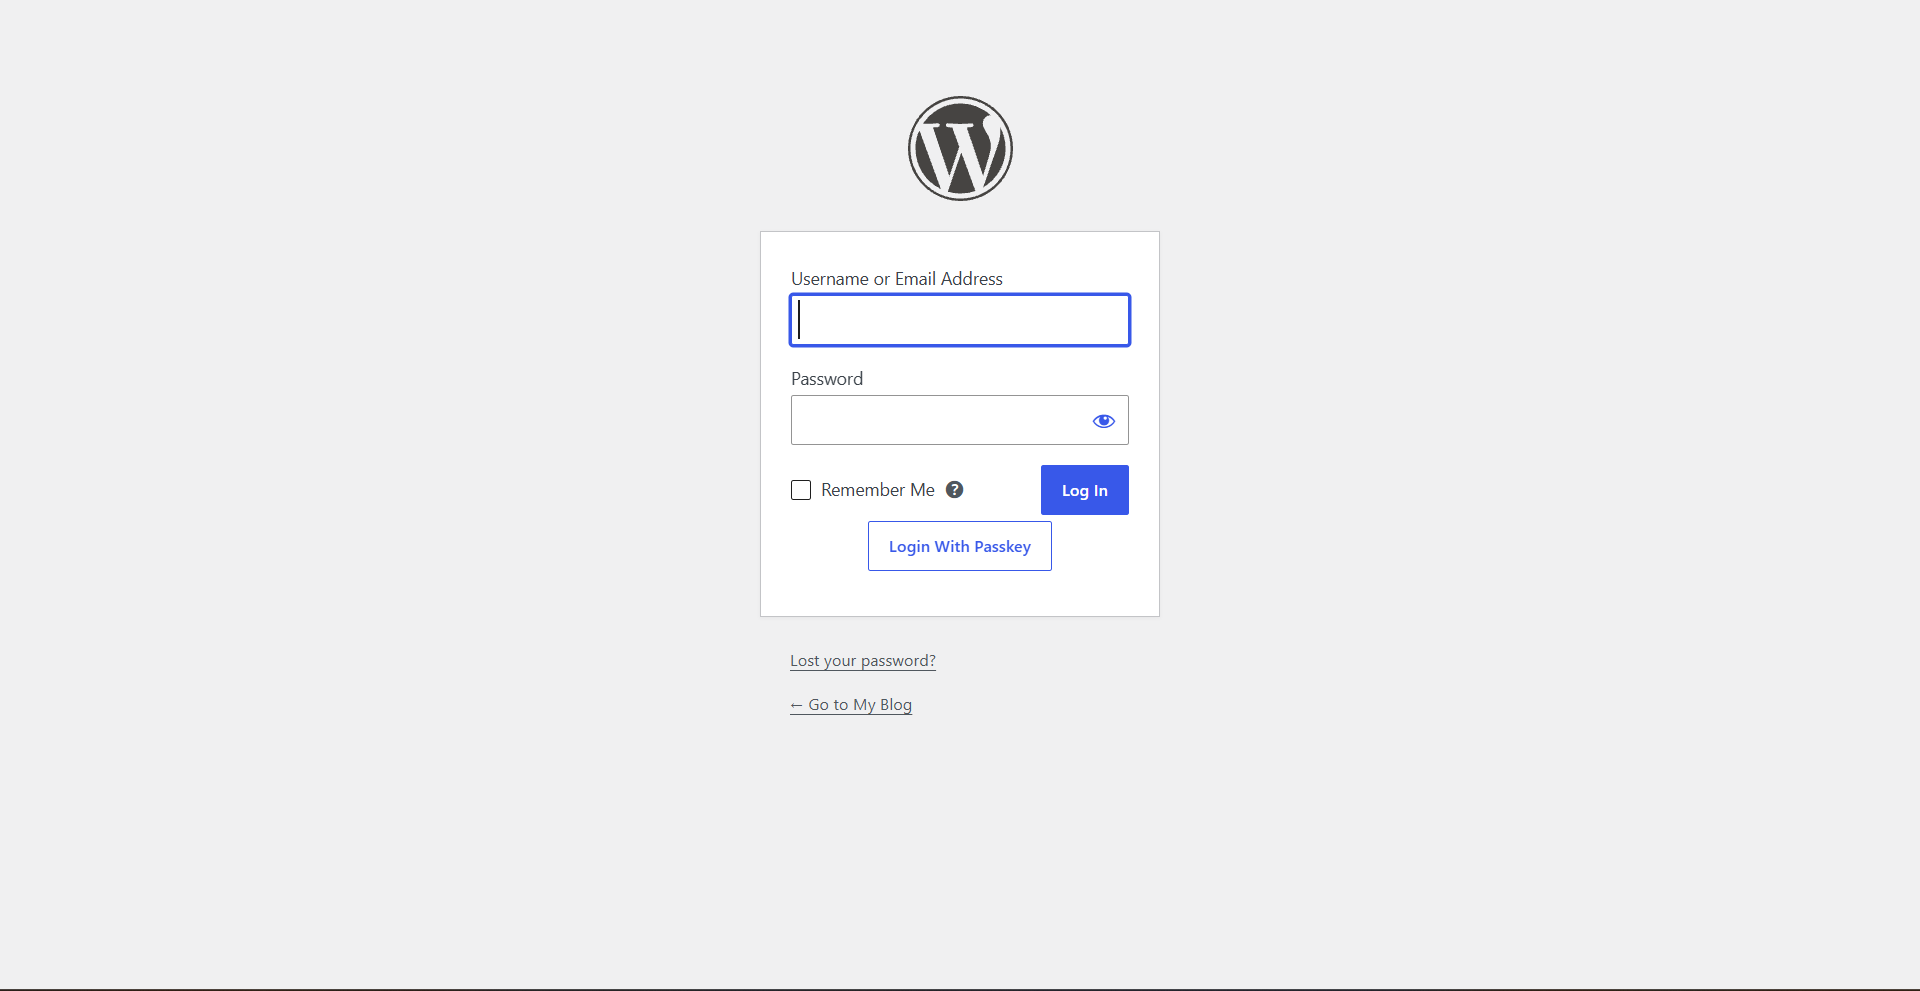
Login with passkey button
    Was this page helpful?
    Newsletter Subscription
    Subscribing you to the mailing list