
Overview
This guide will help you setup CSRF Protection. CSRF Protection is a Loginizer Security Pro feature.
What is a CSRF Attack?
CSRF is acronym for Cross-Site Request Forgery(CSRF). It's an attack where the attacker tricks the victim into making some unwanted requests on the web application you are currently authenticated. It can help the attacker either gain control by making the user change the details, giving control of the system to the attacker, or by making the victim do actions that can benefit the attacker in some way, like making a purchase.
There are mainly 2 ways through which CSRF attacks can happen, one being if the user clicks some malicious link as with the help of social engineering the attacker can send you a link via email, chat, or message.
The Second way is if the attacker creates a legitimate-looking request from the victim's browser to the web application when the user is authenticated to that web application.
How Loginizer Prevents CSRF Attacks?
What Loginizer's CSRF Protection feature does is, it creates a random string on every session and updates the URL of the WordPress Admin with that random string. Hence making it difficult to guess or predict the URL, even with the modern tool it would be really difficult to guess the random session string. So if the URL can't be predicted then the CSRF attack can't happen.
How to Enable CSRF Protection?
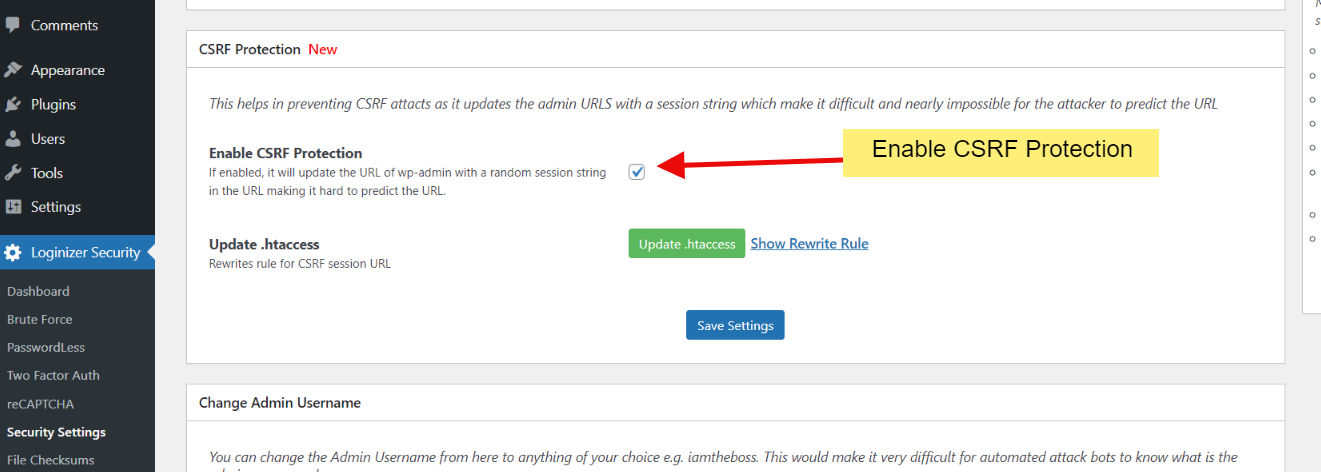
On your WordPress Admin go to Loginizer > Security Settings. In Security Settings page look for CSRF Protection block.
In CSRF Block Enable CSRF option as shown in image below.
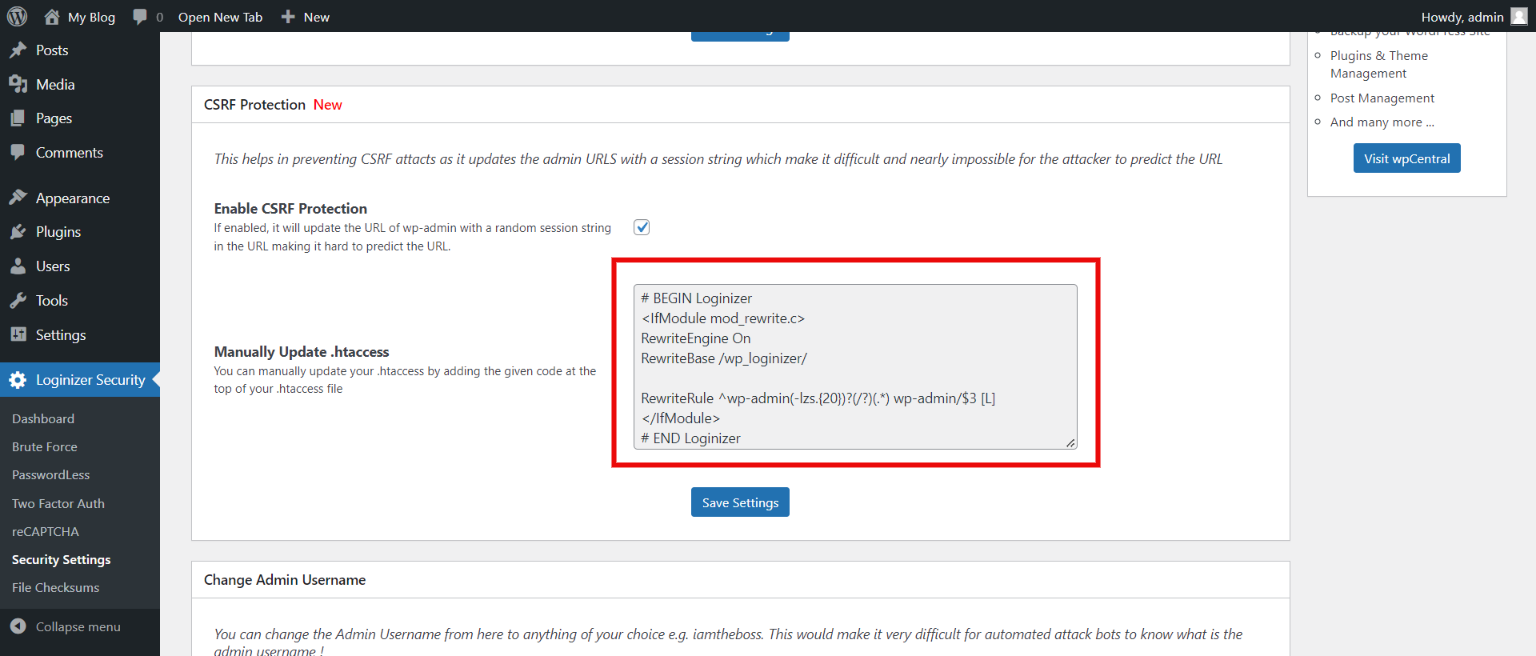
Now Update the .htaccess file, if your .htaccess is writable then you can just click on the Update .htaccess button and your .htaccess will be updated. If your .htaccess is not writable you will need to update your .htaccess file manually.
All you need to do is just put the .htaccess code from the textarea to the top of your .htaccess file. As shown in file below.

Once you have done this now just save settings. And that's it. You will be taken to login to your WordPress Admin.
Expected Behaviors
So once the CSRF Protection is on all your logins to the WordPress dashboard will have a modified URL with a session string just after the admin slug, something like the URL in the image below. The session string will be different every time you log in.

Another main behavior you may experience is that if you are already logged in and then you try to open WordPress admin in another tab then all your session in the other tab will get destroyed. So if you want to use your admin panel in multiple tabs then you will need to keep the same admin URL in every tab because if Loginizer doesn't find the session string in your URL it will log you out.
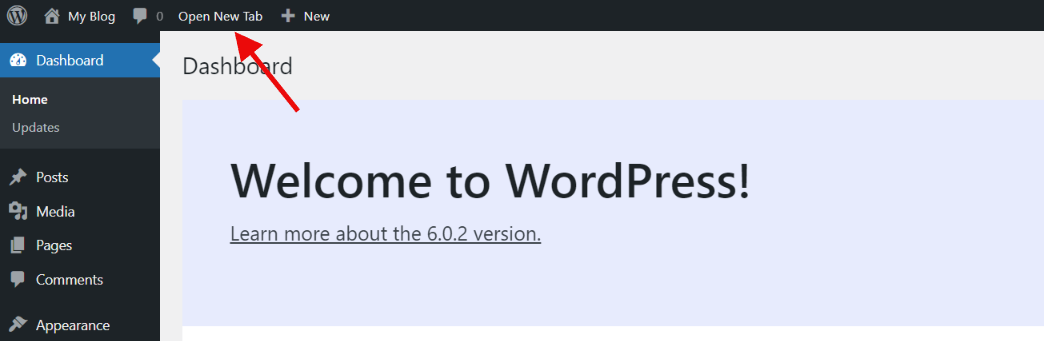
We know it can be annoying and copying and pasting the URL every time you need the WordPress admin in a new tab is a hassle. So to eliminate the hassle of copying the URL we added a button in the WordPress admin bar named Open New Tab. So if you need to open Wp Admin in a new tab just click it and the Admin will open in a new tab without destroying the session.
If you face any issue feel free to contact out support.